DIY Cornhole Boards (How to Build Regulation-Size Boards)
DIY cornhole boards are one of the easiest and most rewarding woodworking projects for beginners. Cornhole (also known as bean bag toss) is a fun backyard game for all ages, and building your own boards lets you save money while adding a personal touch.
In this guide, we’ll walk you step by step through how to build sturdy, regulation-size cornhole boards from scratch – even if you’ve never done a DIY project before. By the end, you’ll have a smooth, durable set you can paint or stain any way you like. Craft your own backyard legend: [티비위키]
Everything You Need to Build DIY Cornhole Boards
Tools and Supplies
Before cutting wood, gather a few basic tools and supplies. Most can be found at a hardware store or online. Typical tools include:
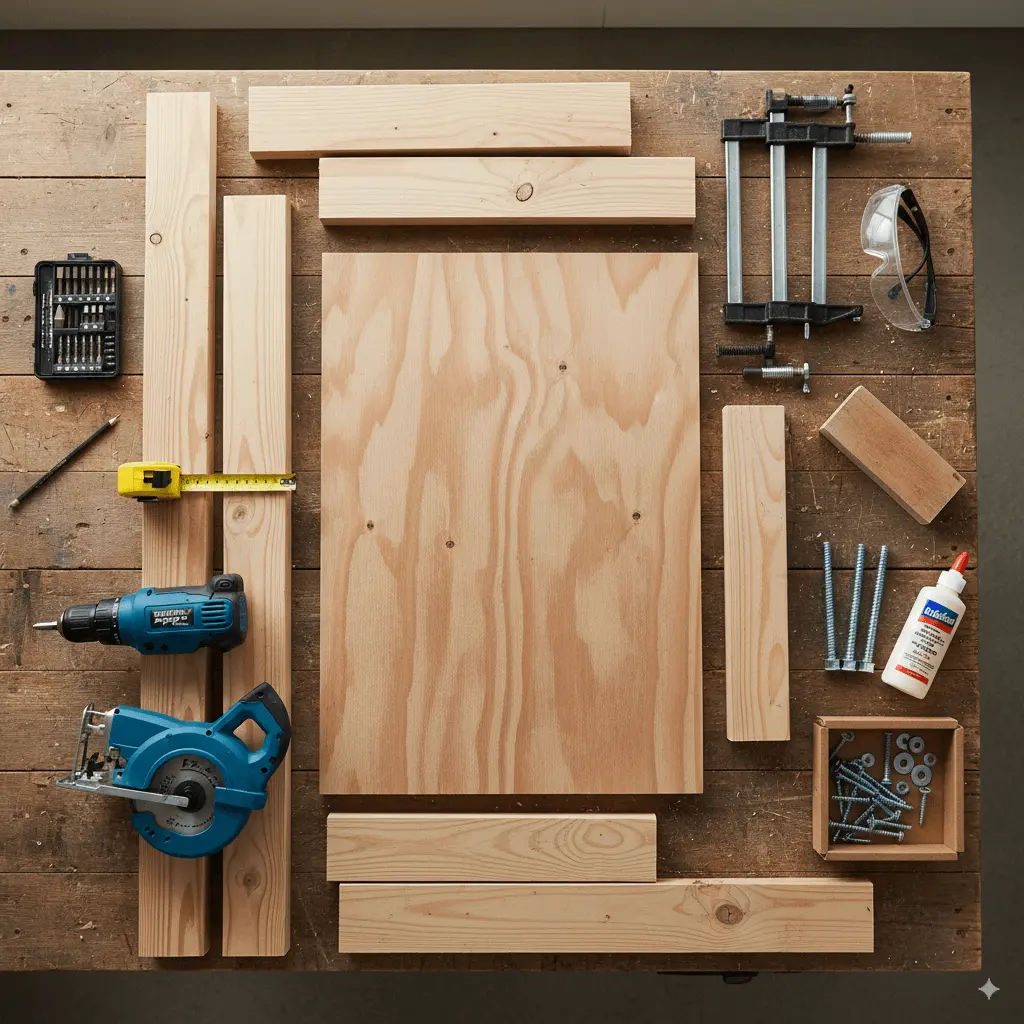
- Measuring tools: Tape measure, pencil, and a square or straightedge.
- Saws: A circular saw or miter saw for straight cuts, and a jigsaw for curves (like the corner of legs). If you don’t have power saws, a handsaw and a miter box can work.
- Drill and bits: A drill (cordless or corded) with drill bits (including a ⅜″ bit for leg pivots). A screwdriver bit or impact driver will be handy for screws.
- Compass or jig: To mark the 6″ hole, you can use a compass or even trace around a 6″ bucket or lid.
- Sander/sandpaper: For smoothing edges. Start with medium-grit (80–120) and finish with fine (220).
- Clamps and safety gear: Clamps to hold boards while drilling or gluing, and safety glasses and hearing protection for all cuts.
Lumber and Hardware (Materials List)
You’ll also need lumber and hardware. A typical materials list for one board (build two boards for a full set) is:
- Plywood: Get one sheet of plywood that’s 2 feet by 4 feet (or larger) and about ½ inch thick. This will become the smooth top surface of each cornhole board.
- 2×4 lumber: You’ll use standard 2×4 boards to make the frame and legs. For one board, cut two pieces to 48 inches (these are the side rails) and two pieces to 21 inches (these are the end rails). You’ll also need two shorter pieces, about 12 inches long, for the legs.
- Screws: Use 2½-inch wood screws for attaching the frame together, and 1¼-inch screws (or 1–1½ inch if your plywood is thinner) to fasten the top. Choose screws labeled #8 or #10 thickness.
- Hardware: For the folding legs, pick up four 3/8-inch by 4-inch carriage bolts, plus washers and wing nuts (two for each board).
- Glue & finish: Wood glue (optional) to reinforce joints, and a clear protective finish (polyurethane or deck sealer) to seal the wood from moisture.
Gather these items before starting. For example, Home Depot or any lumberyard can cut a 4′×8′ plywood sheet into two 4′×4′ pieces, and studs (2×4’s) often come in 92″ lengths.
Building DIY cornhole boards is rewarding, but if you’d rather skip the tools, explore our top-rated cornhole boards for great ready-made options.
Planning and Cornhole Dimensions
It’s essential to adhere to the official cornhole dimensions to ensure your boards are regulation size. Each cornhole board has a playing surface that measures 24 inches wide and 48 inches long. Near the top of the board, you’ll cut a 6-inch hole – it should sit 9 inches down from the top edge and 12 inches in from each side.
When the board is finished, the front edge should stand about 3 inches off the ground, while the back edge (where the hole is) should be around 12 inches high, giving the surface a smooth, gentle slope.
Cutting the Wood for Your Cornhole Boards
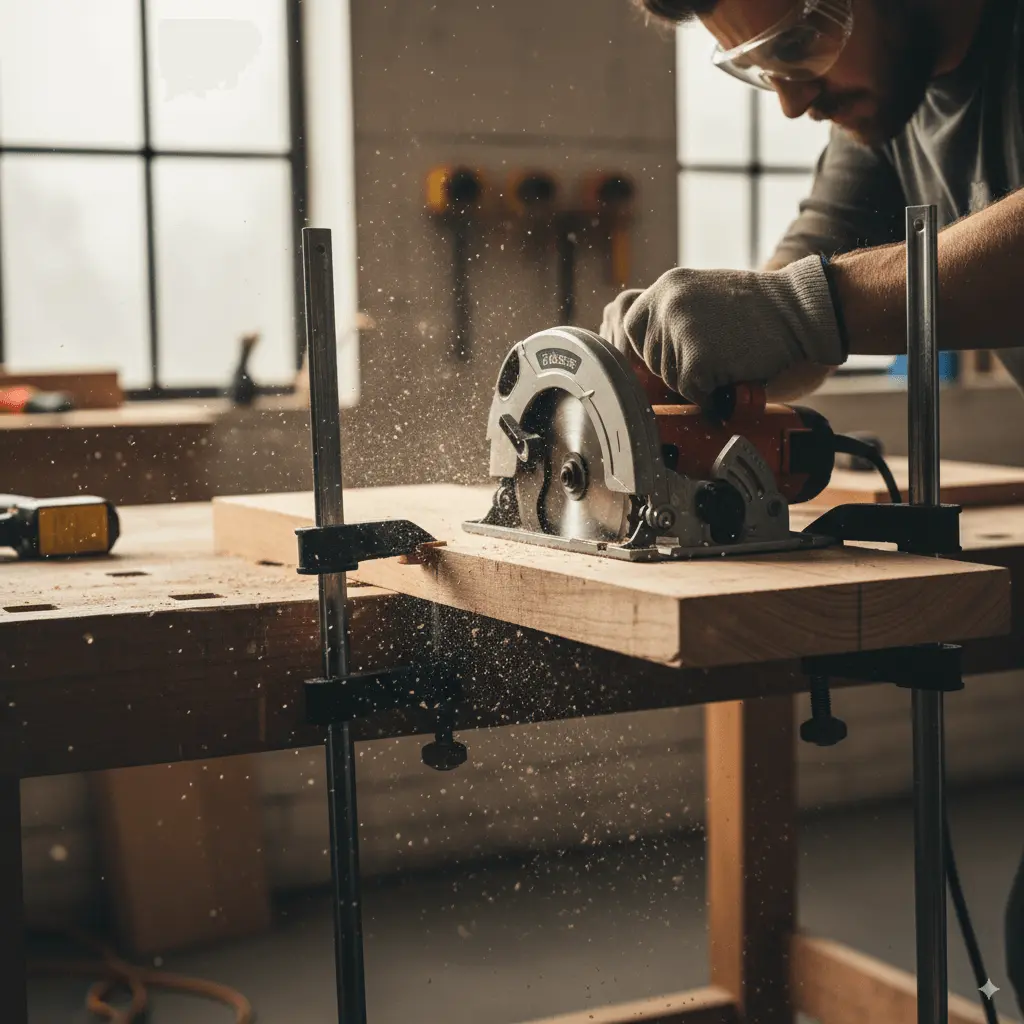
Plywood Tops: Each board needs a flat playing surface that measures 24 inches wide by 48 inches long.You can buy ready-cut 2′×4′ (24″×48″) panels, or purchase a larger sheet of ½-inch plywood and have the store cut it into two pieces of that size.
Frame Pieces (2×4 Lumber): The frame is a rectangle that supports the plywood. Cut two long pieces of 2×4 lumber, each 48 inches long – these are the side rails. Cut two shorter pieces, each 21 inches long – these are the end rails.
Legs: Each board needs two legs to hold up the back end. Cut two pieces of 2×4 about 11½ to 12 inches long. On one end of each leg, cut an angle of roughly 10–11 degrees. This slant allows the board to sit at the proper height (about 12″ at the back and 3″ at the front).
Step-by-Step Construction of Cornhole Boards
Follow these steps to build each board. Use clear, simple movements, and don’t worry if you go slowly – accuracy is key!
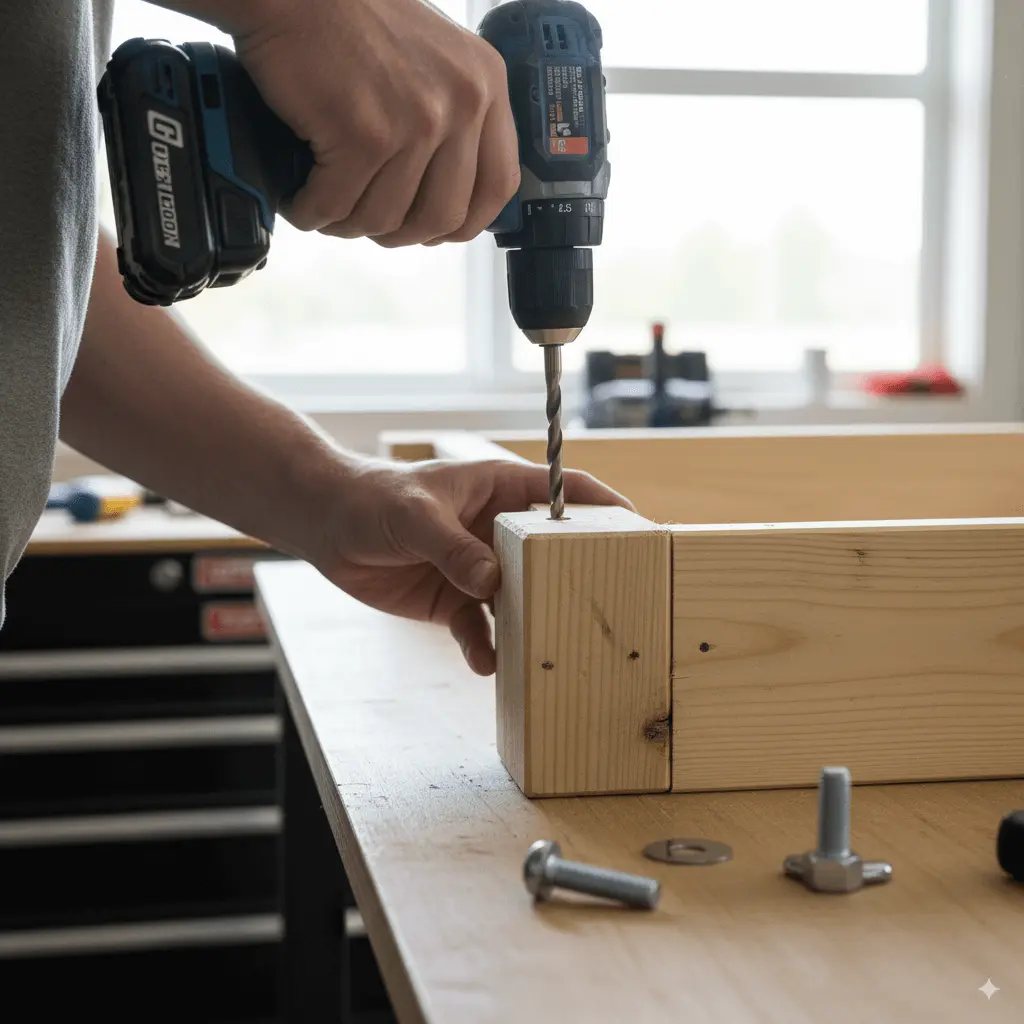
1. Build the Frame
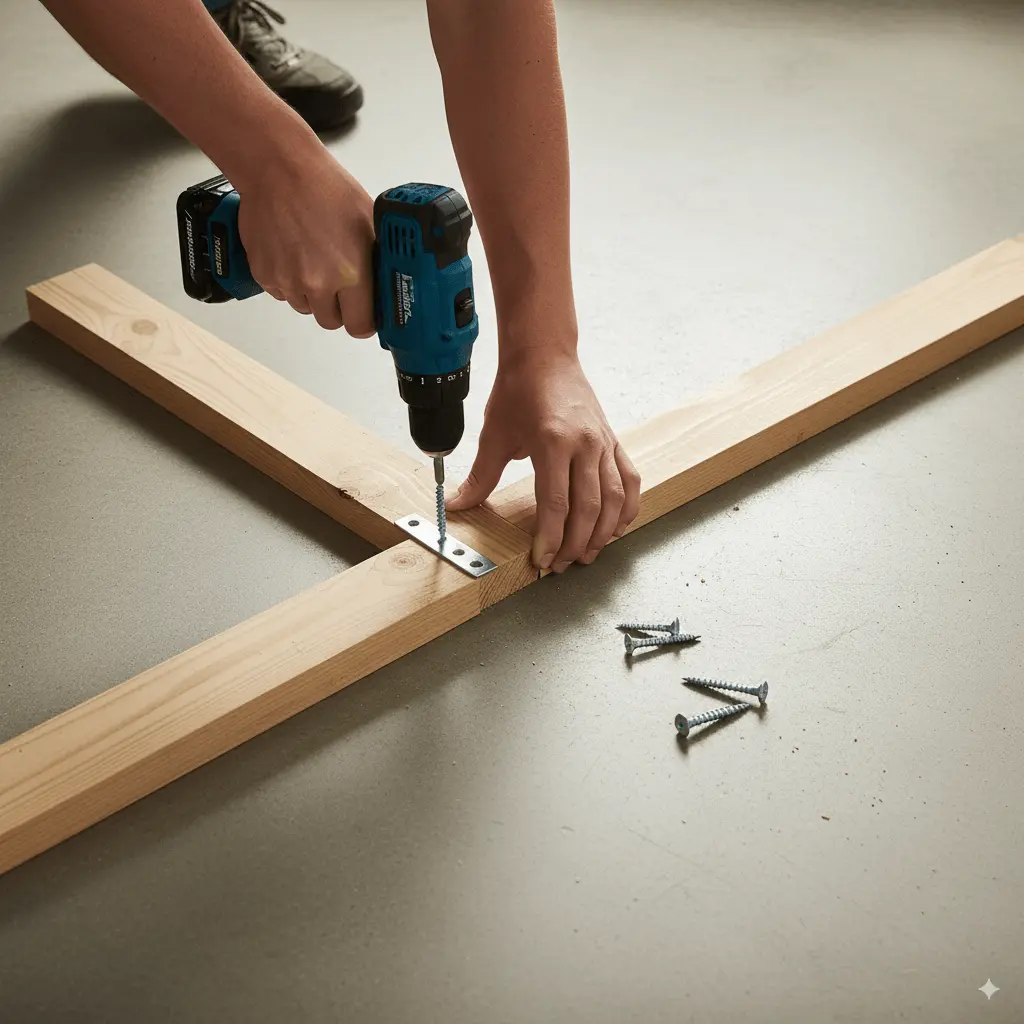
Start by laying out two pieces of 2×4 that are 48 inches long on a flat surface – these will be your side rails. Place the two 21-inch pieces between them at the ends so you form a neat rectangle measuring 48 inches by 24 inches.
If you’d like extra strength, brush a little wood glue on the ends of the shorter boards before you fasten them.
Drill small pilot holes at each corner (this helps keep the wood from splitting), then drive 2½-inch screws through the long side rails into the ends of the short rails.
Use two screws per corner so everything stays solid.
When you’re finished, you’ll have a sturdy wooden “picture frame” that supports the top of your cornhole board – make sure all the corners are at a perfect 90-degree angle and that the frame sits flat on the floor.
2. Attach the Plywood Top
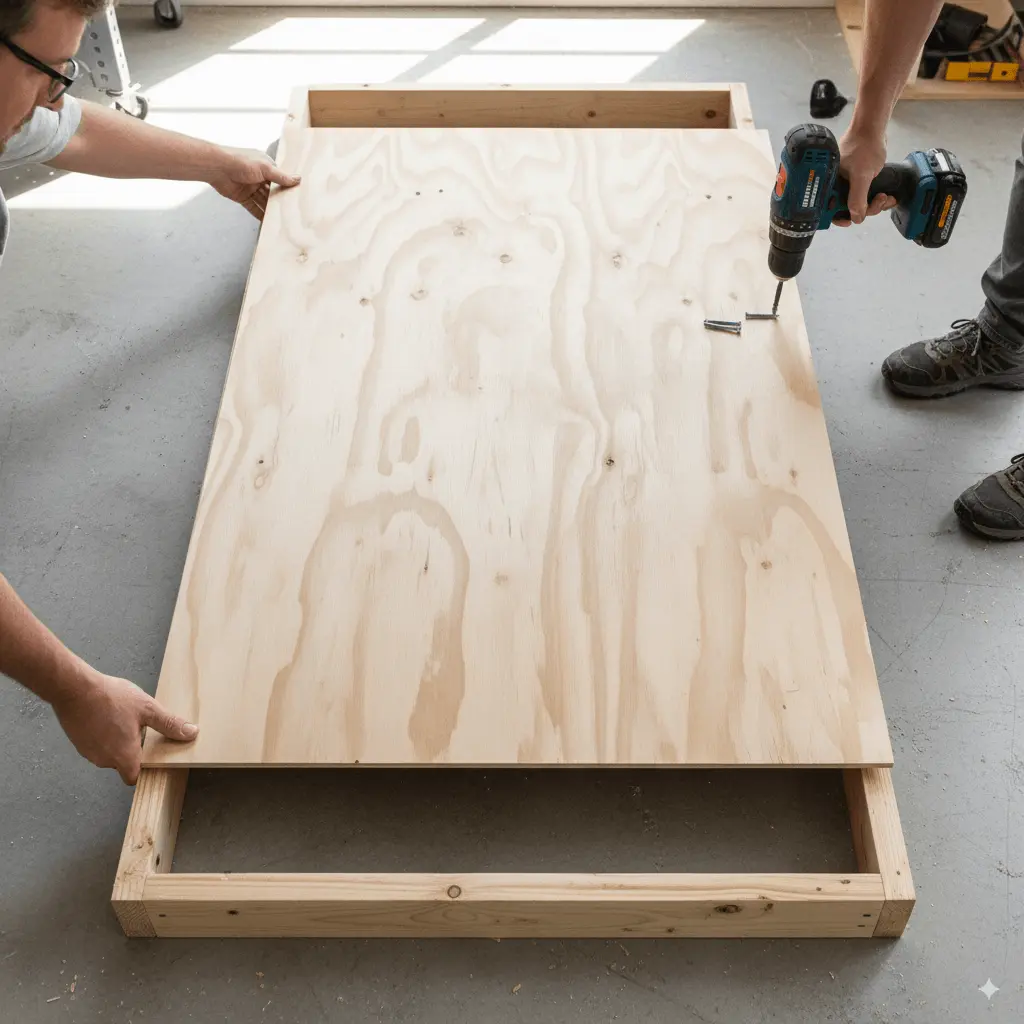
Place one 24 × 48-inch sheet of plywood on top of your frame so the edges line up evenly all the way around (a tiny overhang is fine). If you want a stronger hold, spread a thin layer of wood glue across the top of the frame before laying the plywood down.
Drill small pilot holes through the plywood and into the frame about every 6 to 8 inches, then fasten the top with 1¼-inch screws.
Make sure the screws bite into the frame without poking through the playing surface. If your frame has any pocket holes, keep them facing down so they stay hidden. Check that the plywood sits flat and steady with no wobble.
3. Drill the Hole

Find the center of your target hole by measuring 9 inches down from the top edge of the board along its centerline, and 12 inches in from each side. Mark this point with a pencil – that’s the middle of your cornhole target.
Next, use a compass (or a string tied to a nail) to draw a neat 6-inch circle around your mark. The easiest way to cut it out is with a 6-inch hole saw attached to a drill – it makes a clean, perfect circle.
If you don’t have one, drill a small starter hole near the inside edge of your circle, then carefully follow your line with a jigsaw.
Take your time so the cut stays smooth and even. When you’re done, sand the inside edge of the hole until it’s completely smooth – this keeps beanbags from catching on rough wood. (Tip: Official cornhole boards use a 6-inch hole, so aim for that size.)
4. Make and Attach the Legs
To give your board its proper tilt, you’ll need two folding legs for the back. Start by cutting two pieces of 2×4 lumber, each about 12 inches long. On one end of each piece, measure up roughly 11¼ inches and mark it, then use a miter or circular saw to trim that end at an angle of about 11 degrees.
This angled cut lets the board stand at the official height (around 12 inches at the back). Lightly round or sand the bottom corners so the legs will rest flat on the ground.
Next, create the pivot holes. On the square, top end of each leg, find the corner that will meet the underside of the frame and mark a point about 1¾ inches in from both edges.
Drill a ⅜-inch hole straight through the leg at that spot. Now hold a leg under the frame with its straight end up and angled end down, leaving a small gap-about ⅛ inch – between the leg and the frame so it can swing freely.
Clamp it in place, then drill through the hole in the leg and into the frame so both holes line up perfectly. Insert a ⅜-inch × 4-inch carriage bolt through the leg and frame, slip on a washer, and tighten a wing nut. The bolt acts as a pivot, letting the leg fold down to support the board or tuck flat beneath it when not in use.
Repeat with the other leg, tightening each nut just enough so the legs swing easily but stay firm when the board is set up.
5. Check Level and Angle

Stand your board up on its legs and measure the height at both the front and the back. The back edge should sit at about 12 inches high, while the front should be roughly 3 inches off the ground.
If the board leans too steeply or not enough, adjust by trimming or re-cutting the legs until you hit the right angle. Once the legs swing smoothly and the board feels solid (no wobble), tighten the carriage bolts and wing nuts to lock everything in place.
A handy tip: if there’s just a slight wobble, you can sand a little off the tip or base of a leg to even things out. Some light sanding along the edges or legs is normal – the goal is a stable, level board that sits firmly on its legs.
6. Sand the Surface
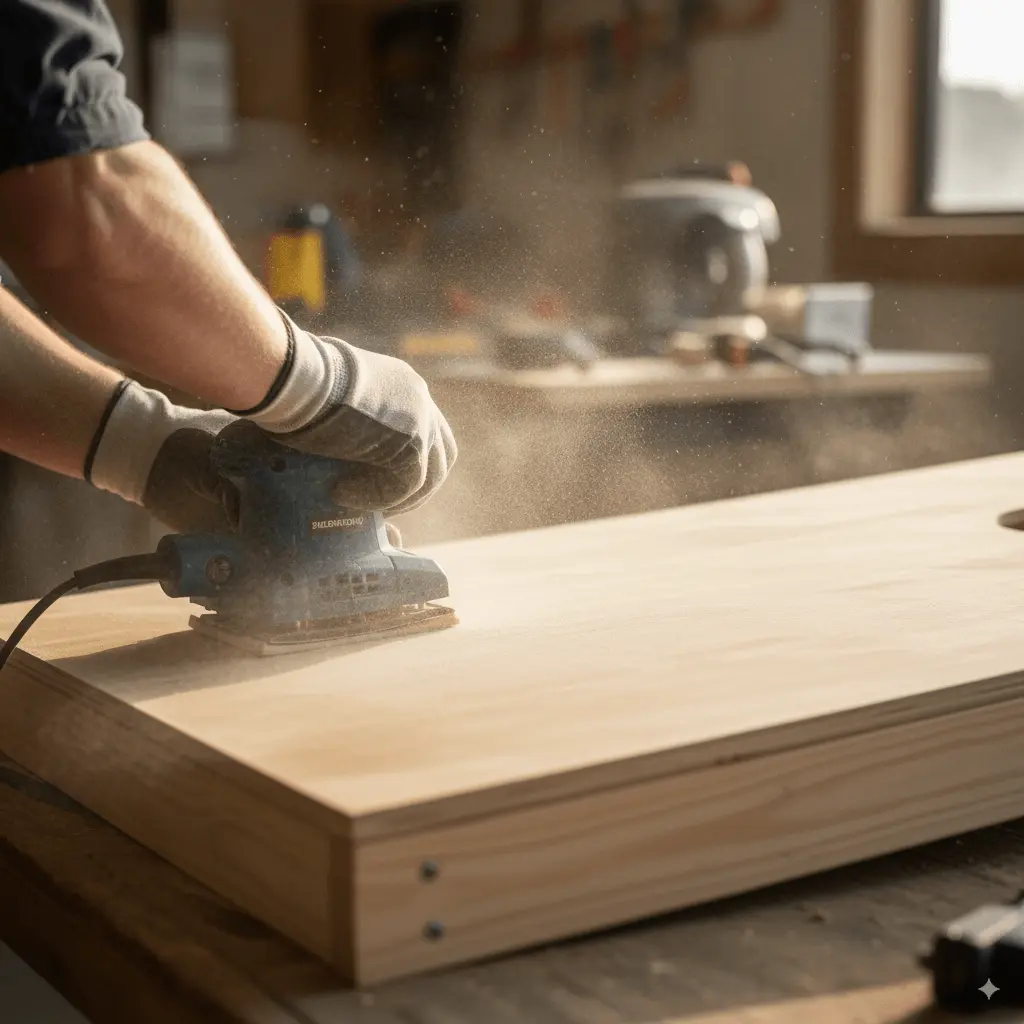
Give the entire board a thorough sanding so the surface is smooth and safe to play on.
Start with a medium-grit sandpaper to remove any tool marks or rough spots, then switch to a fine-grit paper to smooth the plywood, frame, and the inside of the hole.
Make sure all edges feel soft to the touch – rounding sharp corners slightly with a file or router adds a professional finish.
When you’re done, wipe away all dust with a clean, dry cloth.
7. Seal the Surface
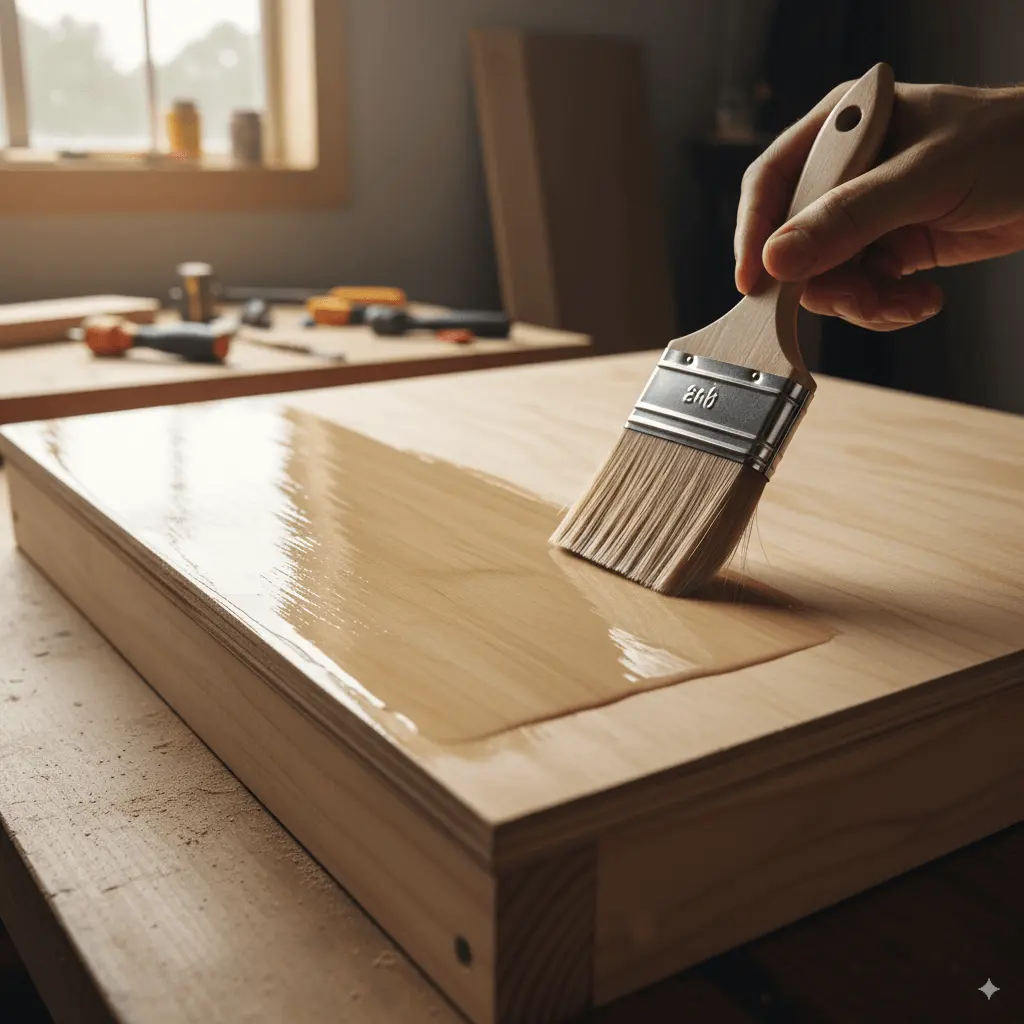
Next, coat every surface with a clear sealer or polyurethane to protect the wood from wear and moisture.
This step is especially important if your cornhole boards will live outdoors – be sure to seal all sides, edges, and the hole’s inside edge.
Many builders prefer a glossy or semi-gloss finish, which is also the standard for tournament boards. (The official cornhole guidelines recommend a smooth, semi-gloss surface.)
Allow the sealer to dry completely according to the product’s instructions.
After sealing, you can add some personality with paint or stain. Use painter’s tape or stencils to mark off your design, then apply latex or spray paint in your chosen colors. A popular touch is outlining the hole with a 6-inch circle and a 1-inch border.
Once your design is fully dry, apply another light coat of polyurethane to lock in the finish and keep your artwork looking sharp. Your custom design will make every game feel special!
Tips, Safety, and Common Mistakes
Working with wood and power tools can feel intimidating at first, but keeping a few best practices in mind will make your DIY cornhole project both safe and enjoyable.
Prioritize safety
Always wear eye protection when cutting or drilling, and add hearing protection if you’ll be sawing for a while. Clamp your boards securely before making cuts, and keep your hands well clear of blades. Take a moment to read the instructions for any power tools you’re using.
Measure twice, cut once
Accuracy is key for a level, professional-looking board. Double-check every measurement – 48″ × 24″ for the playing surface, 9″/12″ for the hole placement, and 12″ for leg height – before you make a cut. Use a speed square to keep your angles true.
Pre-drill screw holes
A small pilot hole (just a bit smaller than your screw’s shank) helps prevent the wood from splitting, especially near the ends of boards.
Be careful with fancy joints
If you decide to use a pocket-hole jig or biscuit joiner for a cleaner frame, make sure to set the bit depth correctly and use the right screw length. If you’d rather keep things simple, butt joints with wood glue and screws work perfectly.
Check leg alignment
Make sure both legs are cut to the same length and angle so your board doesn’t rock. A quick side-by-side comparison before attaching them saves headaches later.
Cut the hole slowly
Putting a strip of painter’s tape over your cutting line can reduce splintering. A hole saw gives the smoothest finish, but if you’re using a jigsaw, take your time and sand the inside edge once you’re done.
Seal every surface
Don’t forget the underside and edges of your board — they’re just as likely to absorb moisture as the top. A coat of outdoor sealer on the bottom will help your boards last for years.
Do a test fit first
Before committing to glue or tightening every screw, loosely assemble the frame and legs. Confirm that everything lines up and moves as it should, then fasten it all together.
By following these tips and working carefully, you’ll end up with sturdy, regulation DIY cornhole boards that you can enjoy for countless backyard games. Take it one step at a time, and have fun – building your own set is half the satisfaction of playing!